Brazing a Broken Dropout

Way back in 2011 my beloved Surly Crosscheck broke with a cracked rear dropout. I raced on it on the Husky Cycling team in college, toured on it across Washington State; Switzerland, France, and Spain; Japan; and across the US from California to Florida, and I was sad to lose it.
Luckily I was only riding on the sidewalk when it happened and got super wobbly. It took me a while to understand what was going on, because at first I just thought it was a flat. Maybe jumping up onto that sidewalk roughly is what broke it, I don't remember.
At the time, I decided to buy a 2011 Speciale Randonneur rather than deal with the hassle of hiring someone to fix the frame. That Masi is still my primary ride, and I like it for many of the same reasons I loved my Surly.
One of the reasons I like steel bikes is that they can be easily repaired while on a tour. It took nine years, but I finally decided to try and fix it myself, by learning how to braze.
Material selection
I bought some class RBCuZn-C "Low Fuming Bronze" bare brazing rod and Harris 600 flux (boric acid and borax) from Central Welding Supply. I wanted class RBCuZn-B nickel bronze like I saw for sale at Bike Fab Supply and Frame Builder Supply, but after some research I learned that the only difference is a small amount of nickel to improve the distribution of iron and that they would largely behave the same in practice.
I used an old Bernzomatic oxy-propane torch that I got from my dad. It's similar to the brazing torch kit they currently make, but labelled propane only.
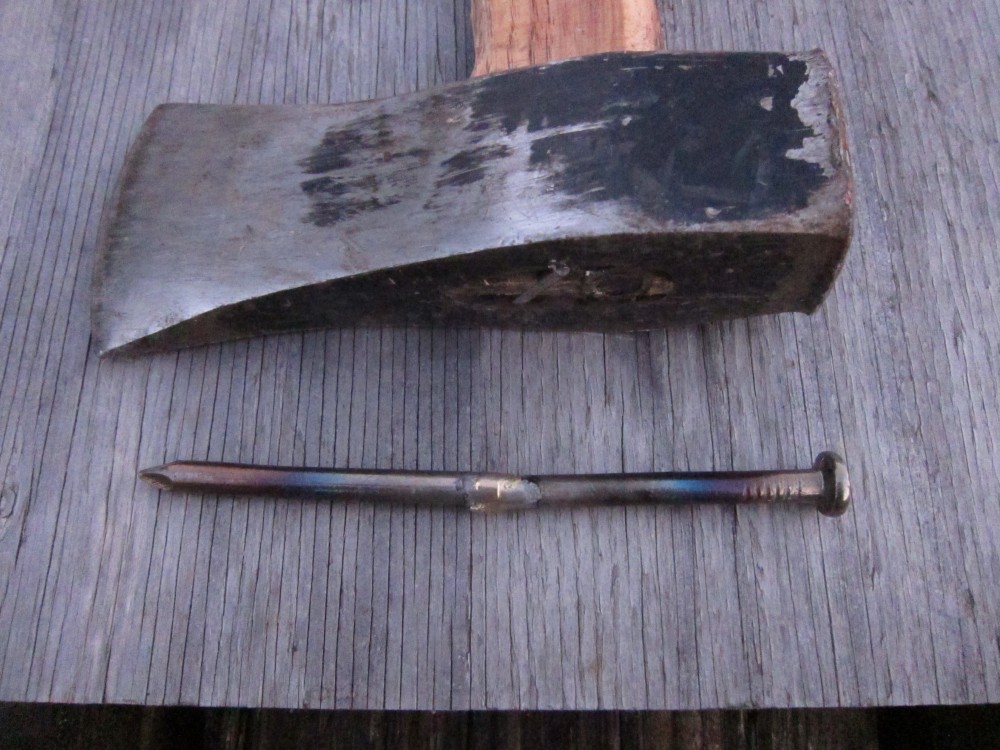
I started with a few small test brazes, all butt joints: a small nail cut in half, some woodruff keystock material (carbon steel) from the hardware store, and then a large nail cut in half.
The large nail's diameter and thermal mass was greater than the braze I wanted to do on the bike, so it was a good test for whether the torch could put out enough heat.
The torch took some adjustment. I'd start the flame with propane only, add oxygen to get a neutral flame, add more propane, then more oxygen to get back to neutral and then slightly oxidizing. The cheap valves on the torch where touchy, but I was able to get something that worked. The flame would slowly become more and more oxidizing as the valve failed to regulate, but I was able to manually adjust it during use.
Here's the repaired nail:
It easily passed an informal strength test:
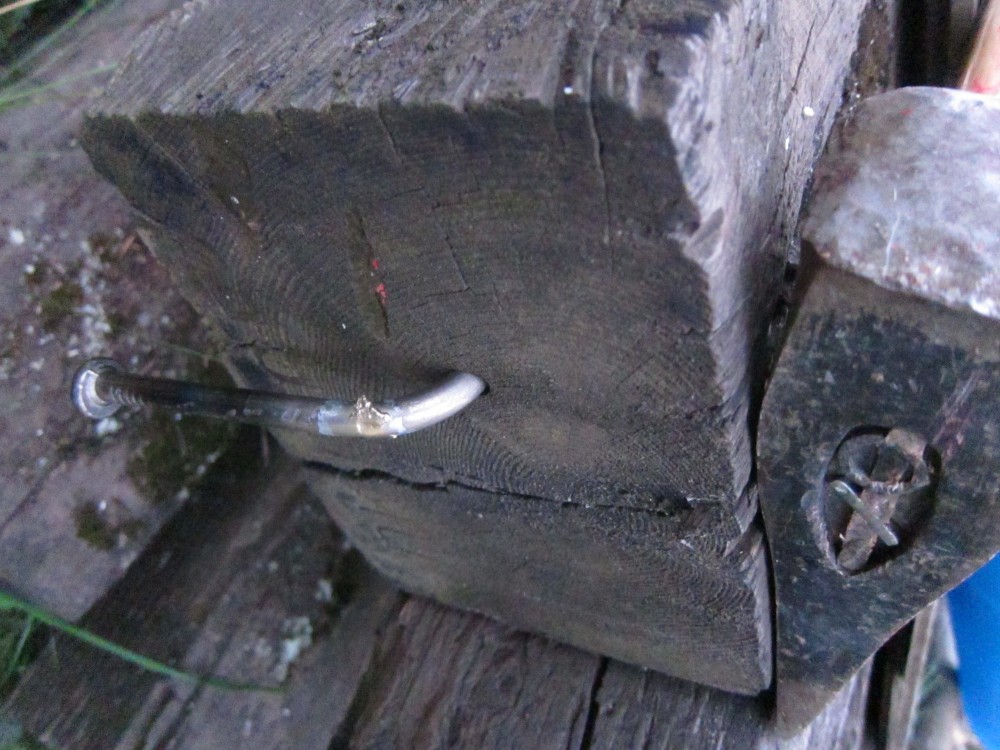
With that butt joint test out of the way, I was fairly confident a butt joint would be strong enough for repairing the dropout.
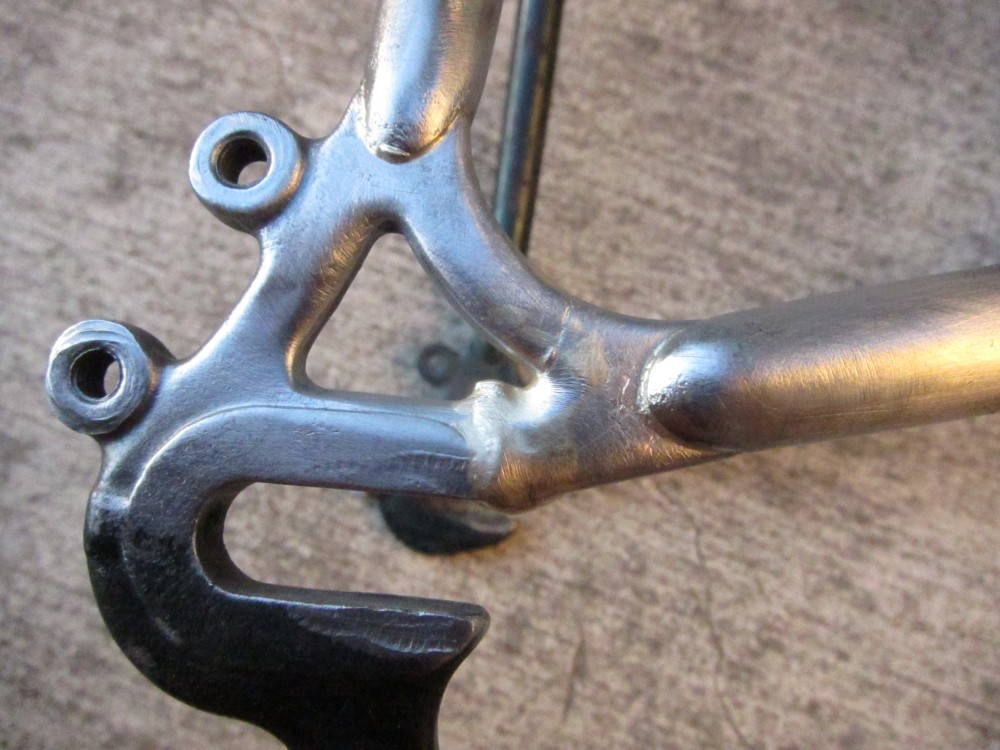
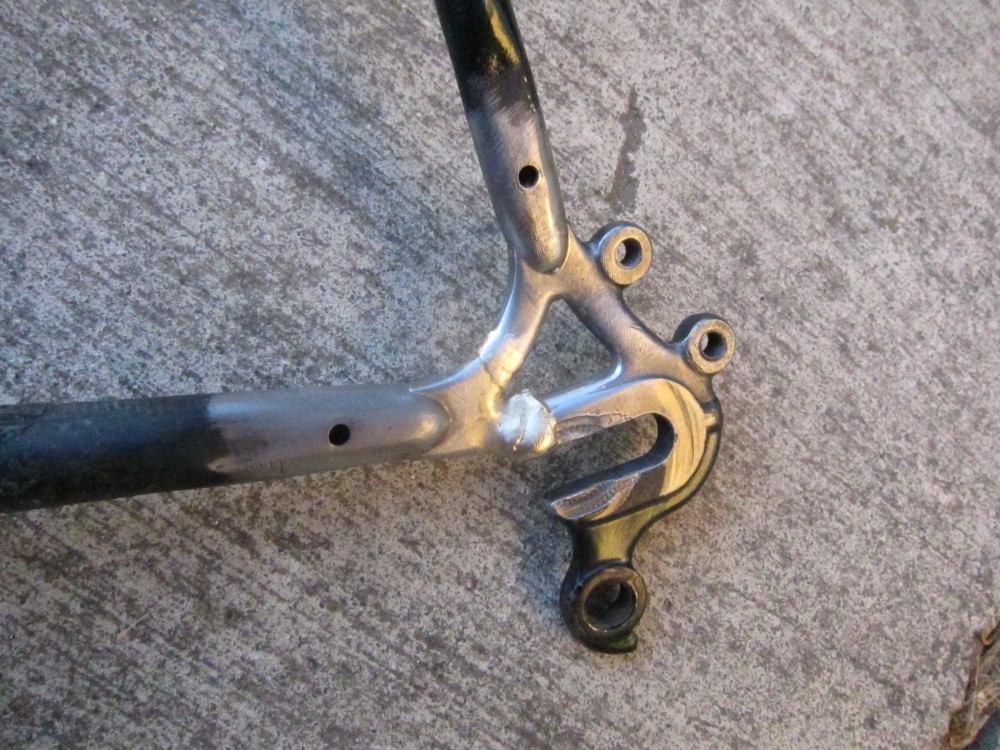
Surface prep is essential to a quality weld of any kind. I used a wire brush in my electric drill and some plumber's emery cloth to strip the paint and clean the metal. None of my solvents on hand would strip it, and removing any rust is important anyway. This photo shows the start of the surface prep:
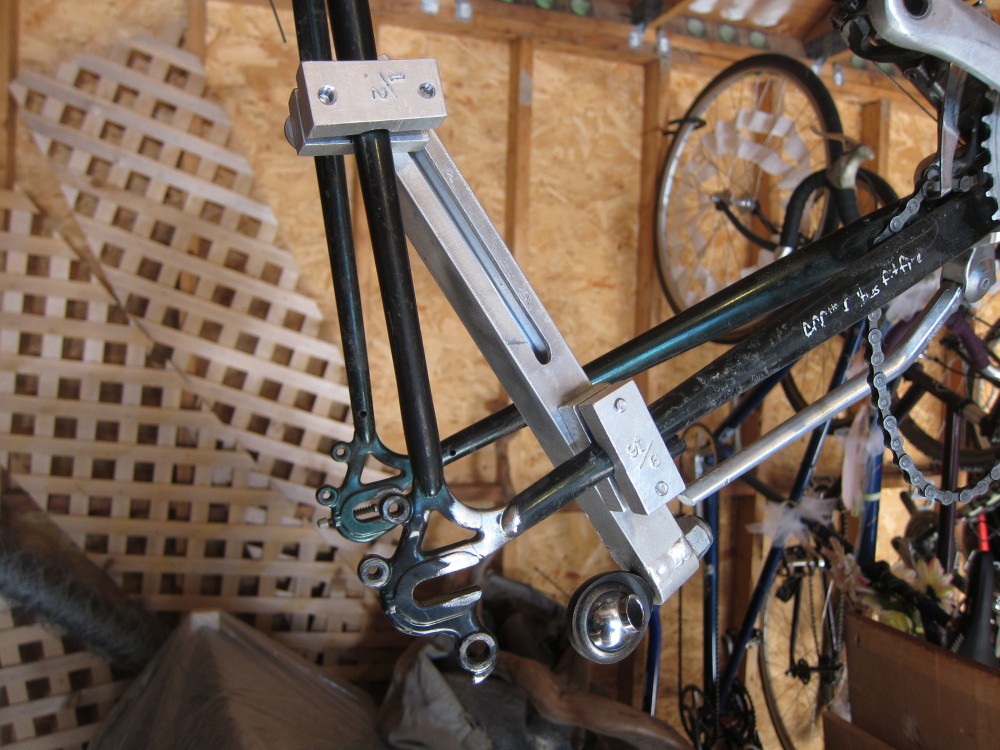
I'm super lucky that I didn't have to make a custom jig to hold the seatstay and chainstay in place. My Haulin' Collin Trailer hitch does that job perfectly. My main worry was that heating the dropout to brazing temperature would loosen the existing brazed joints and move things out of place.
All fluxed up with some flux-water paste:
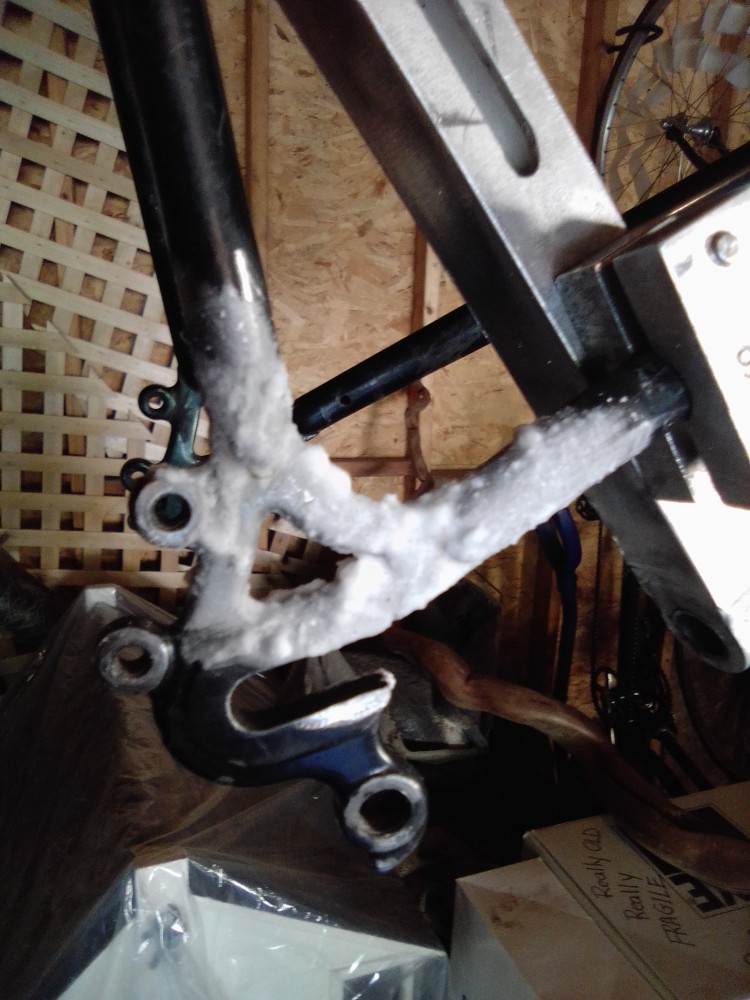
It took a while to get the joint up to temperature, but once it did, the brazing rod flowed very freely into the crack, and sagged down to form a blob at the bottom of the joint. Sir Mix-a-Lot would like to stay and play, but when you're brazing it's important to hit it and quit it, so I stopped as soon as I noticed the blob form. It might have been neat to fillet the joint a bit to give some extra strength, but I didn't practice fillets beforehand and didn't think it was worth the risk of melting the existing braze joints.
Still hot from the flame:
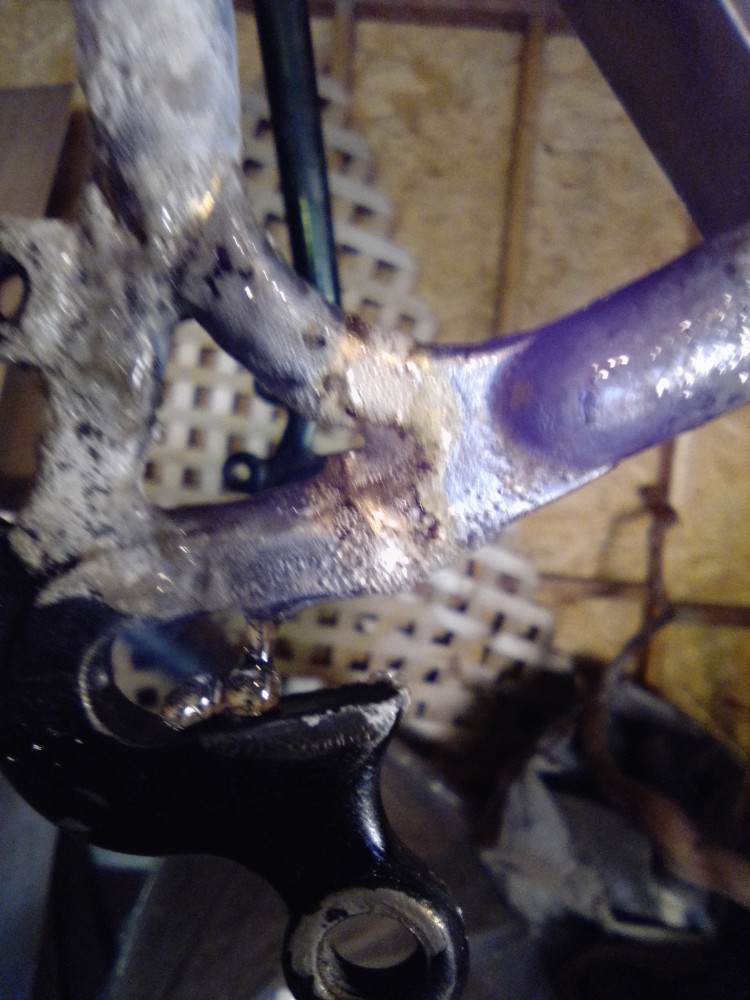
After a lot of wire brushing and sanding, I got the glassy flux off:
The blob:
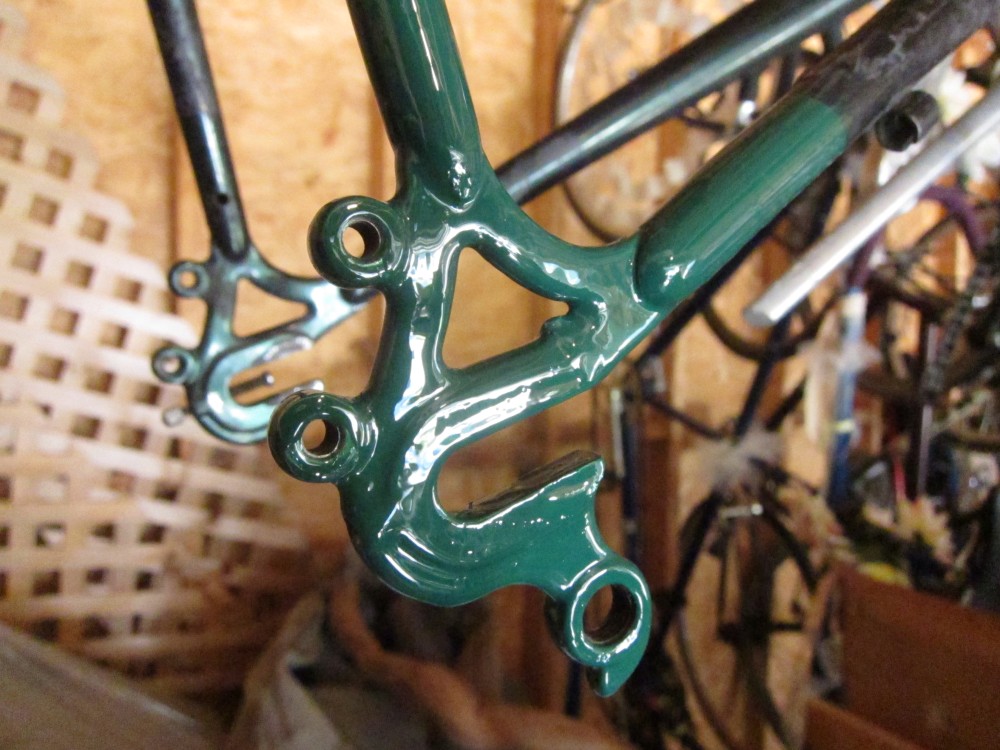
And for those who like to watch paint dry on the internet, here's the second coat waiting to dry:
I haven't had a chance to ride this yet, but I'm hoping it works out. If it breaks again, well at least I started to learn a new skill.
Update
After the paint dried, I took the bike out to the Bellingham Pump Track and the repair felt really solid. And I also realized just how small that frame is for me. I'm 6'3" and the frame is only 56cm. I ended up giving the bike to a friend that helped me move earlier in the year.